Google Tag Manager-Integration - Google Analytics 4
Google Tag Manager-Integration - Google Analytics 4
Using the Google Tag Manager integration we provide and its connection to the Google Analytics platform, you can track visits within the order menu and measure the conversion rate of your orders.
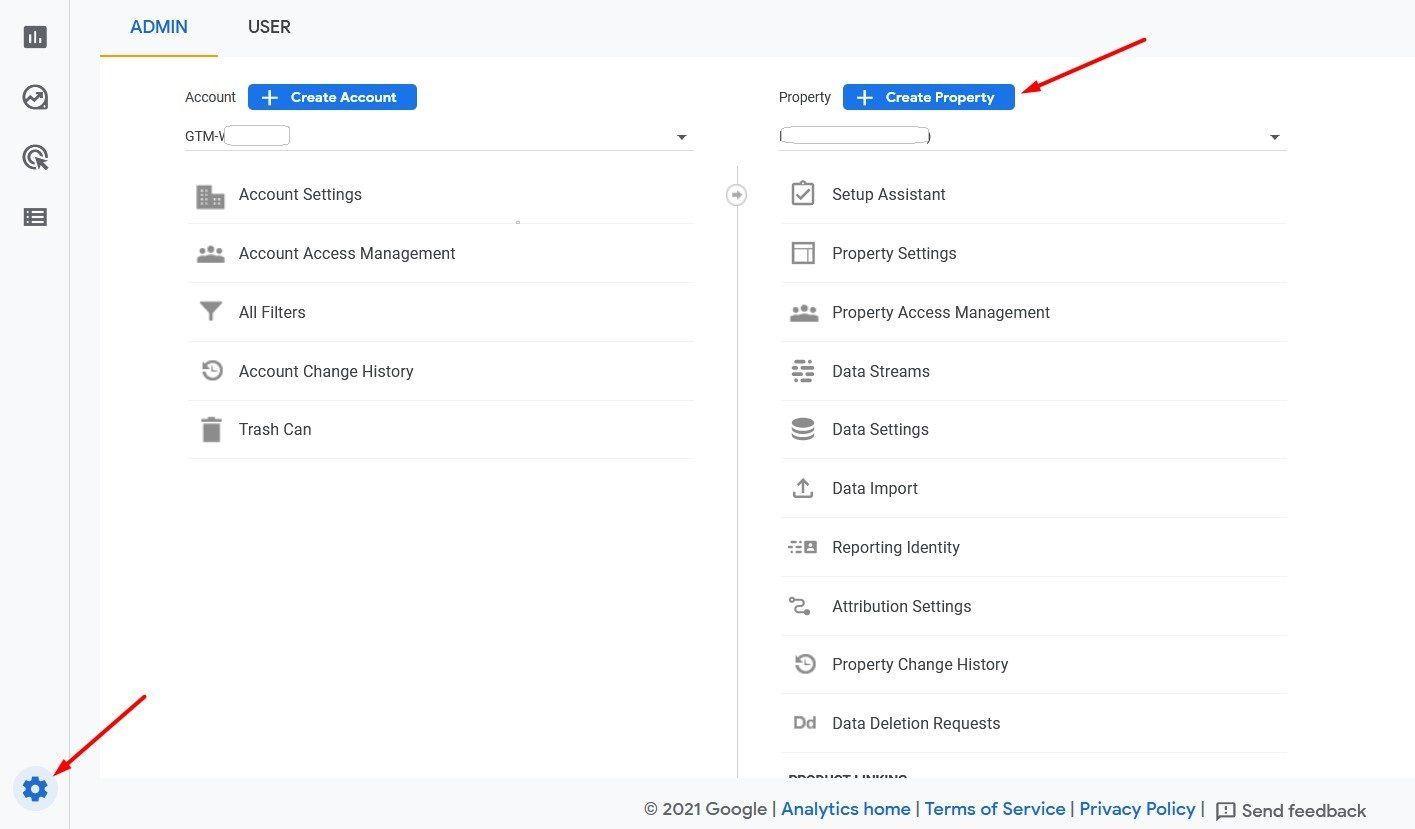
To connect Google Analytics to the Google Tag Manager account, go to Admin in the Analytics account and click on "Create property".
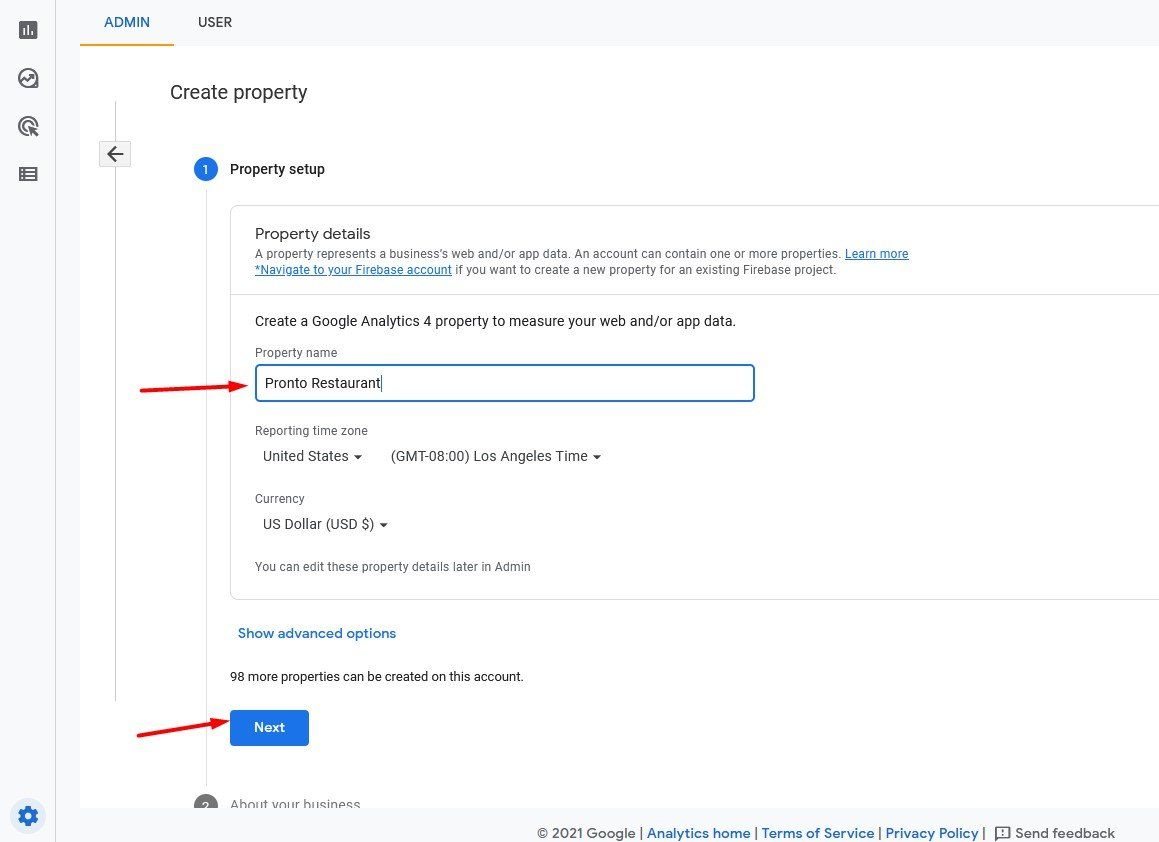
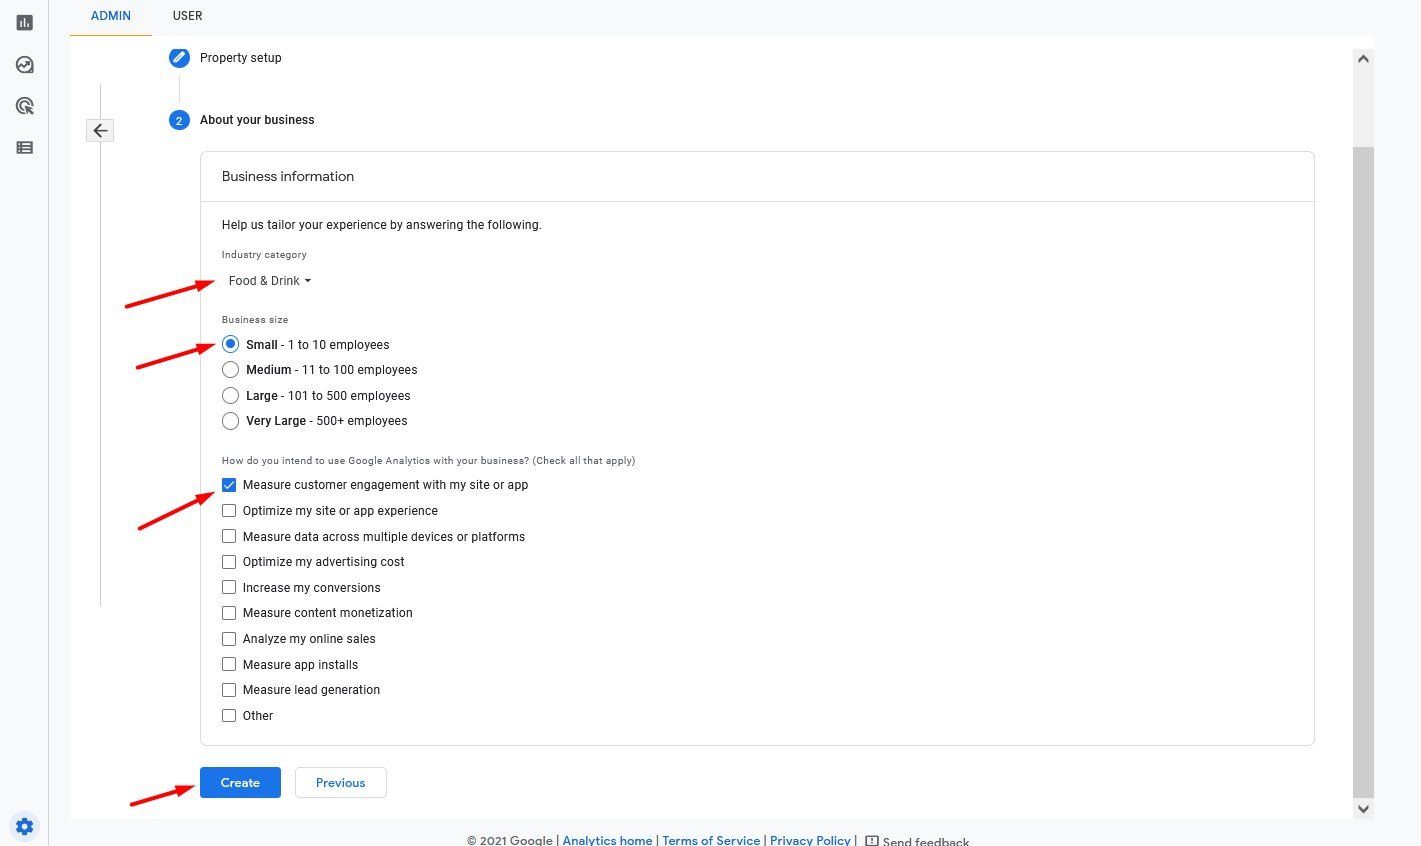
In the next steps, you will need to enter certain data for your property and your company - property name, type and size of the company, and the goal of data monitoring:
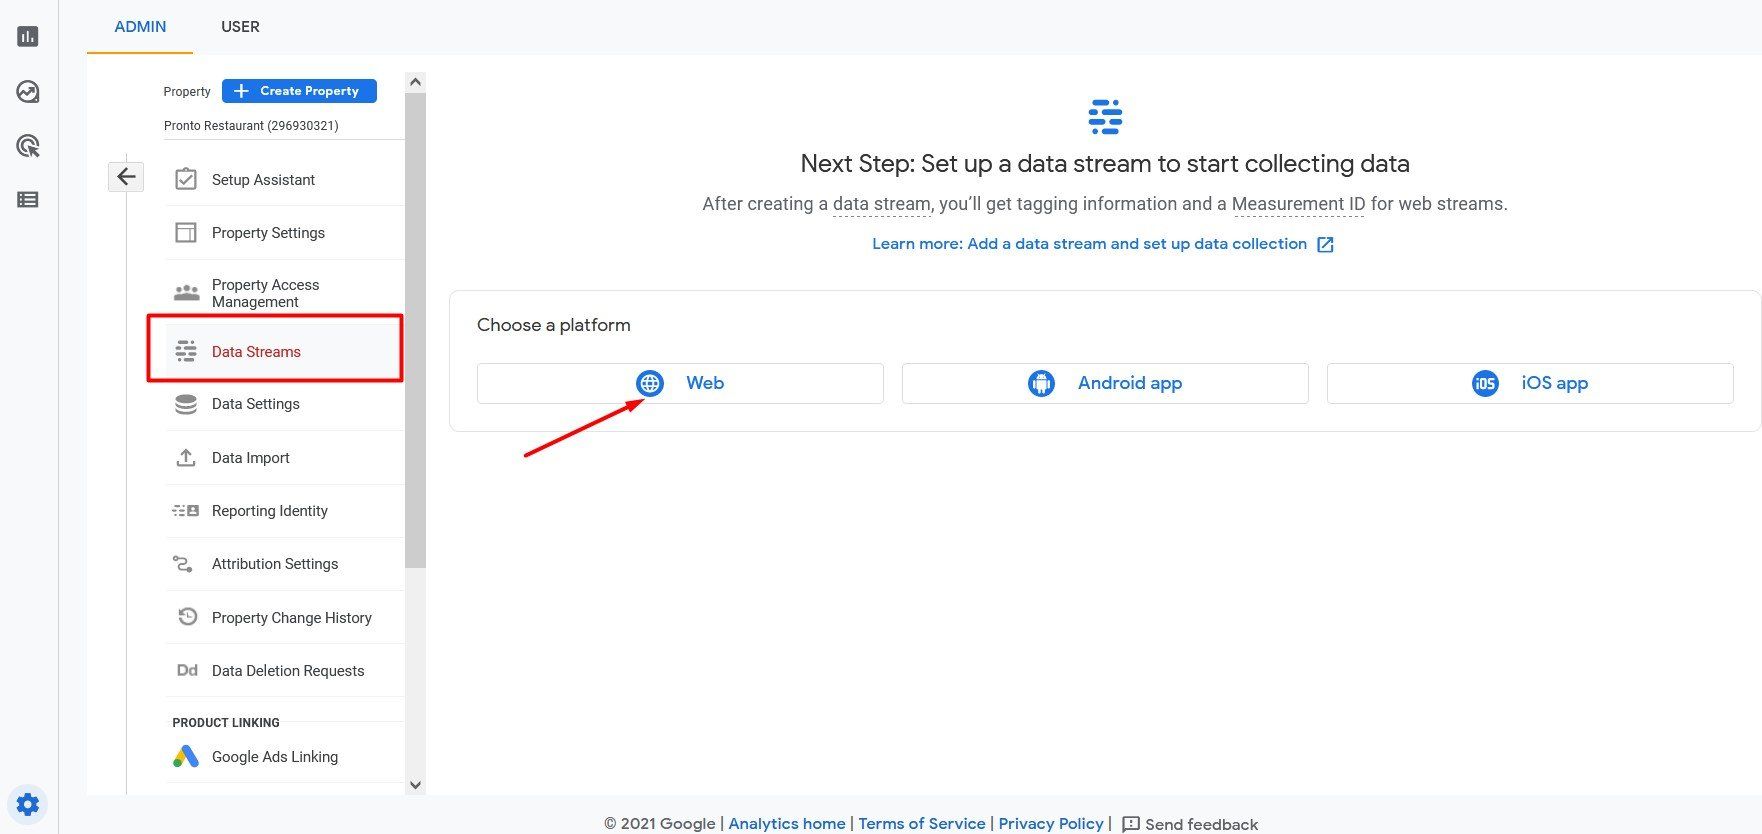
After you have entered this data, you will be asked to select a platform type from which Analytics will collect information:
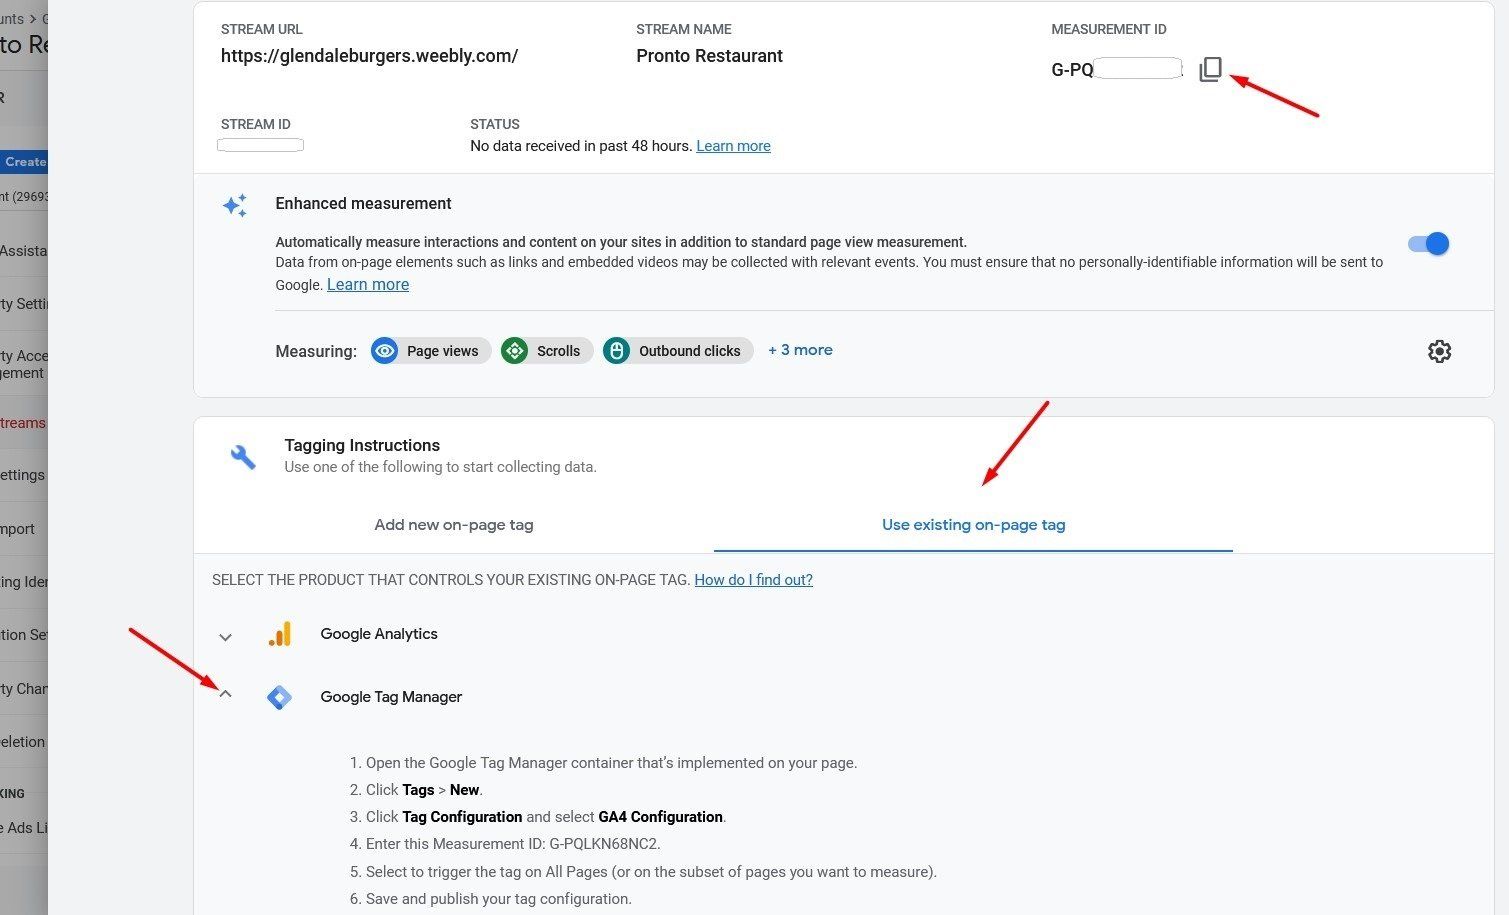
On the next screen, you will see the measurement ID, which was generated based on the information you submitted to Google. Copy this, as you will need it in some of the following steps of this setup.
Additionally, in the “Tagging Guide” section, select the “Use an existing on-page tag” option and then click on Google Tag Manager to view the further steps you should take to connect Analytics to your Tag Manager account.
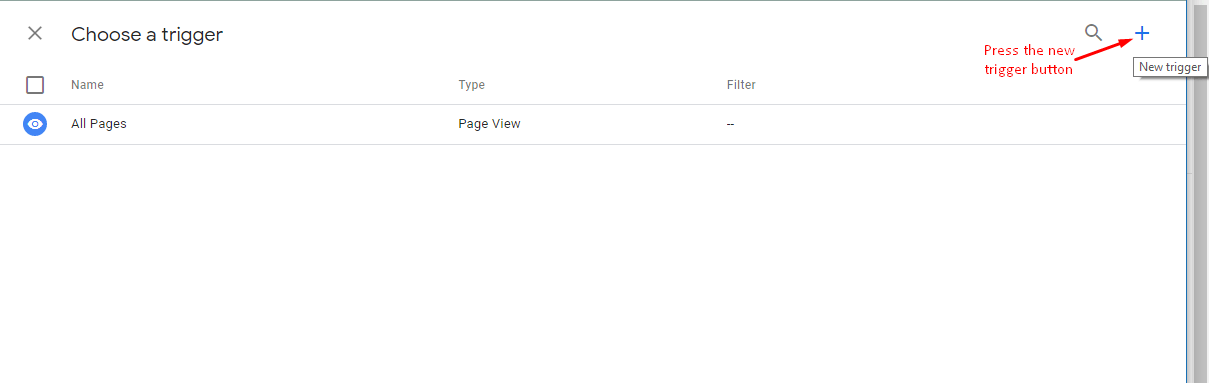
Next, go to your Google Tag Manager account -> Workspace, click on the Tags tab and then on New to create a tag:

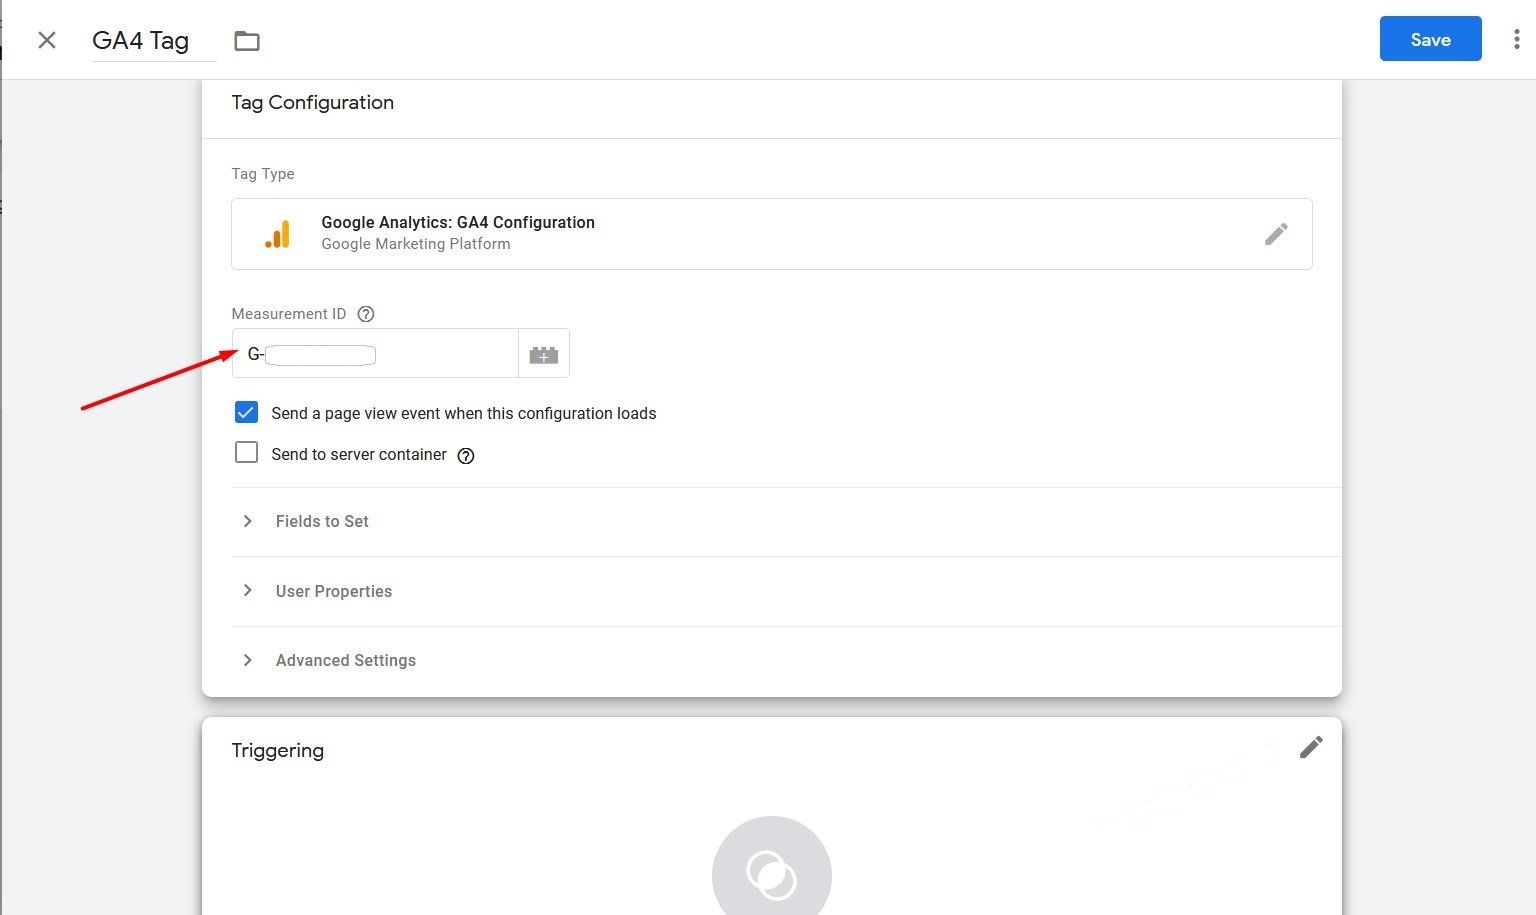
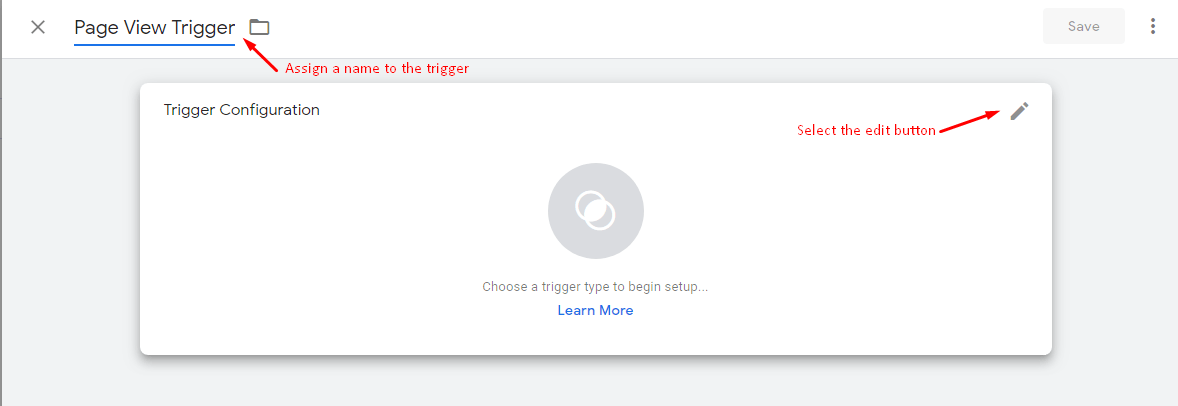
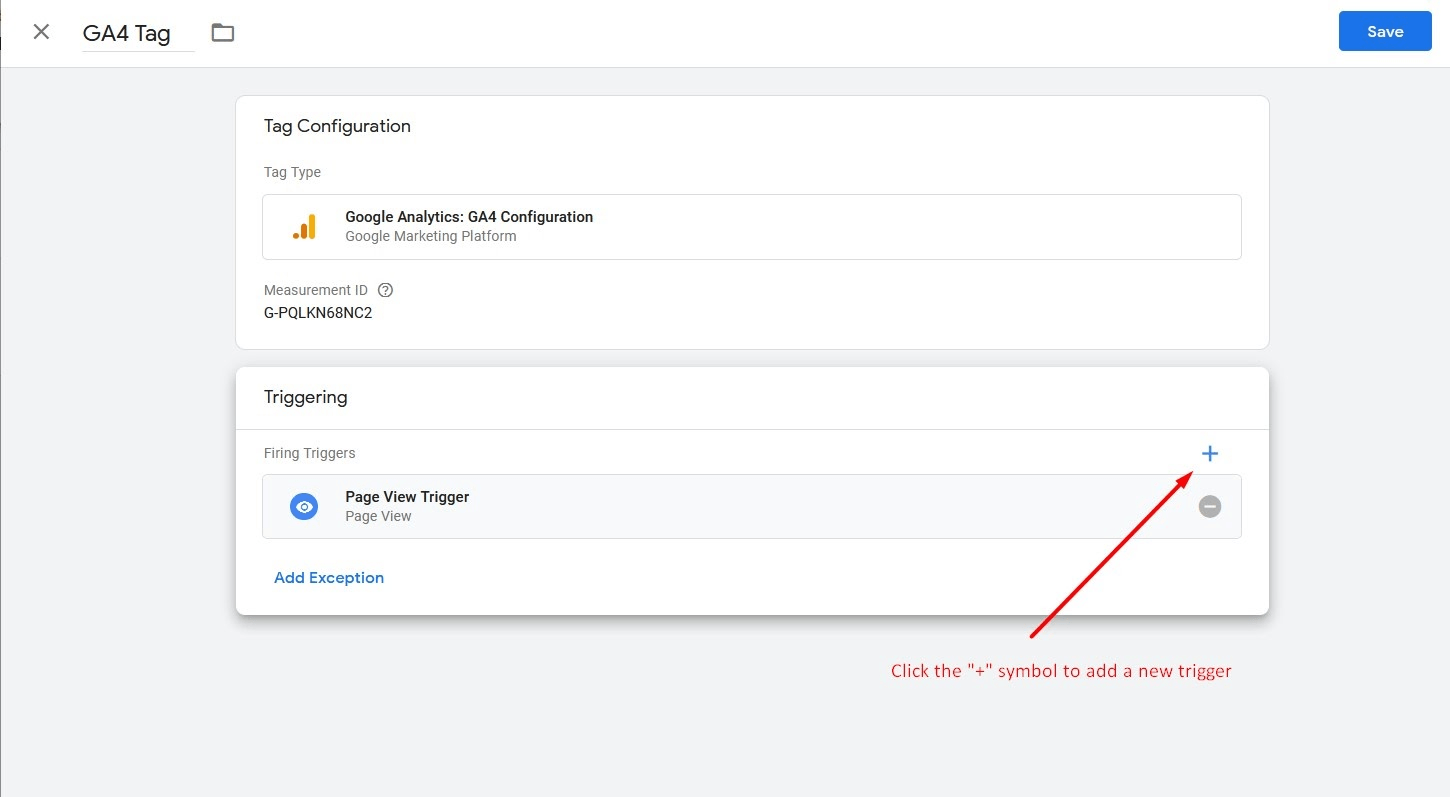
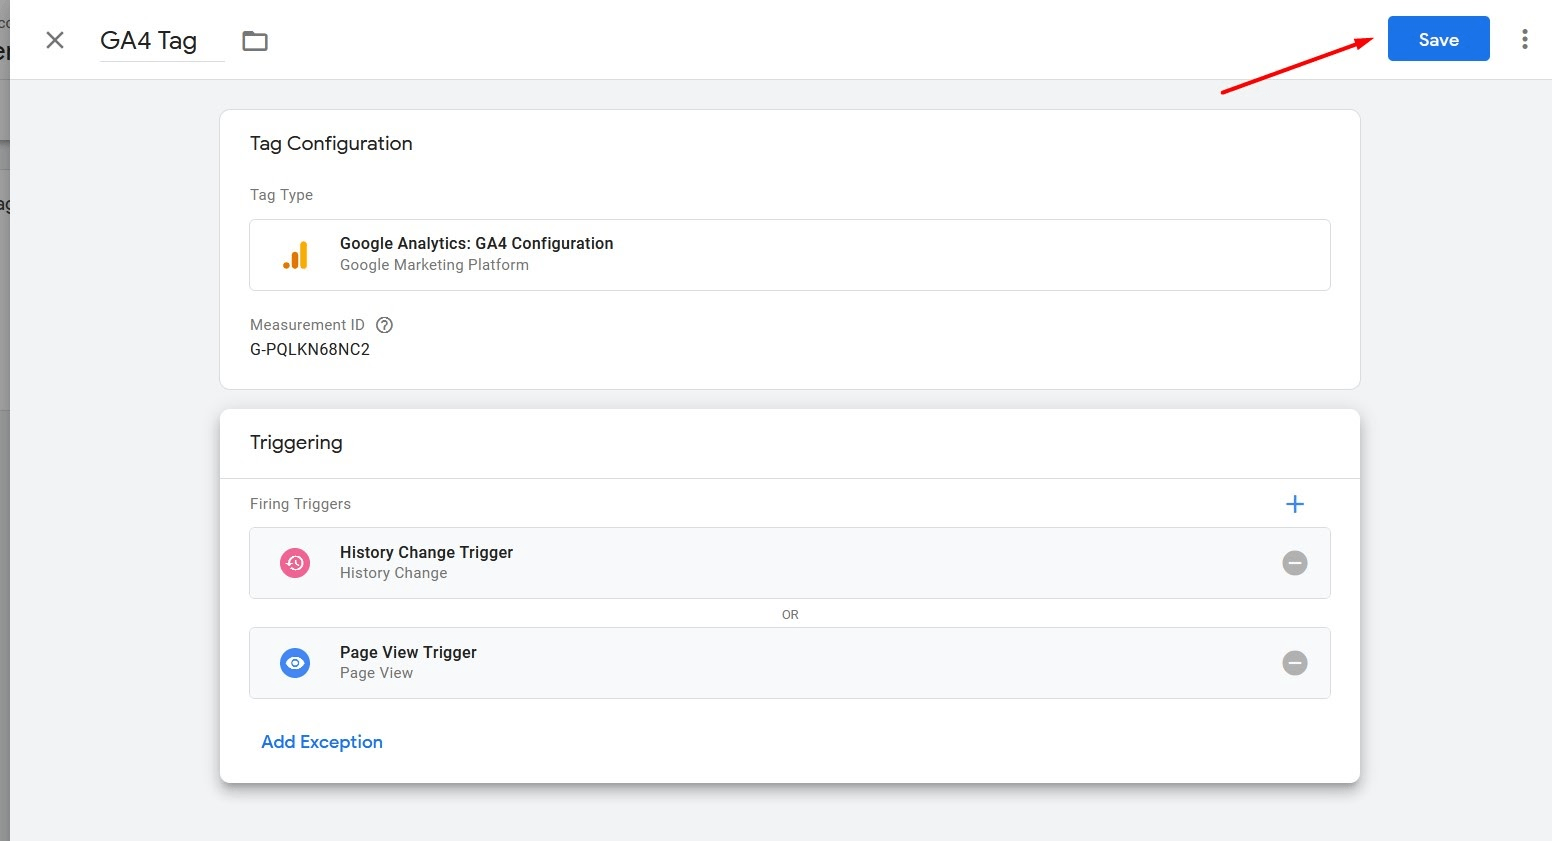
Name your tag - preferably a relevant and easy-to-remember one - and then click Edit to select the "Google Analytics GA4 Configuration":

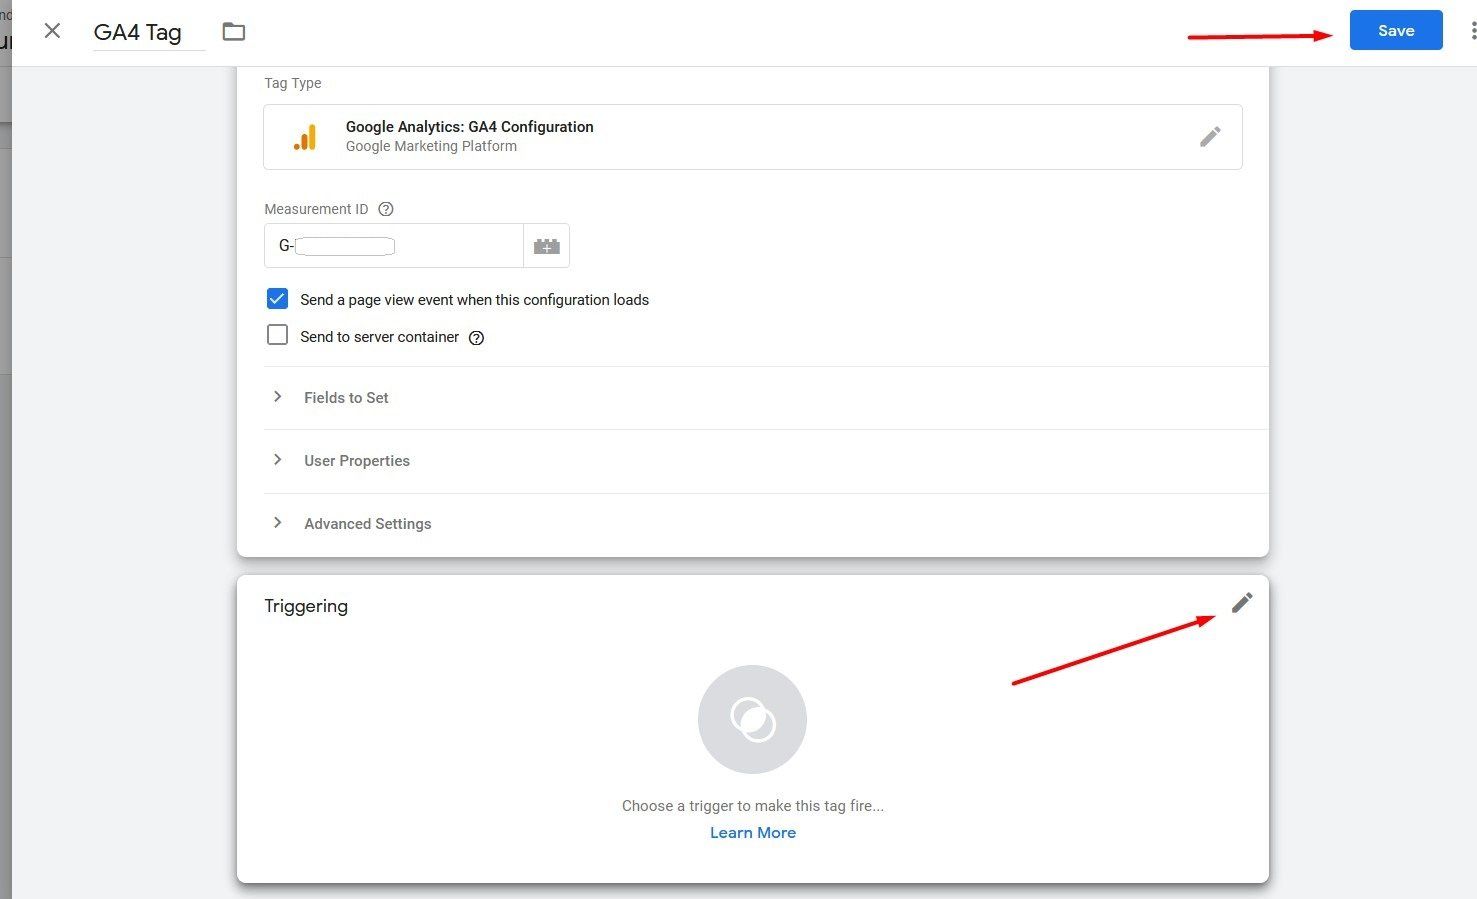
In the tag configuration, add the measurement ID of the previously created property and go to the Triggering section below to begin working on the triggers for this tag:
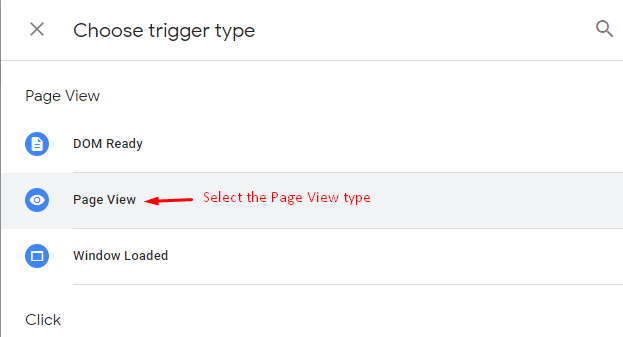
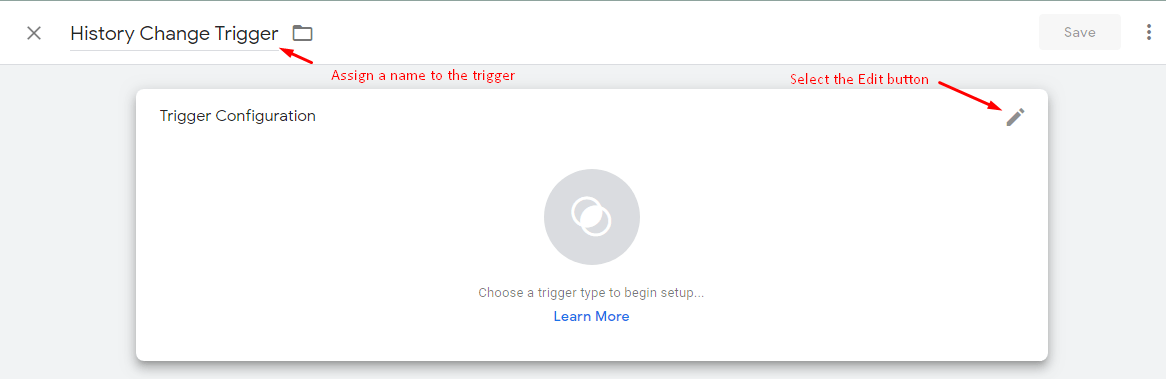
In the next step, you configure the two triggers for the Google Analytics tag. You can do this by accessing the Edit button, as follows:
- Page view - so that you can see every page in the analysis (if there is a different URL);
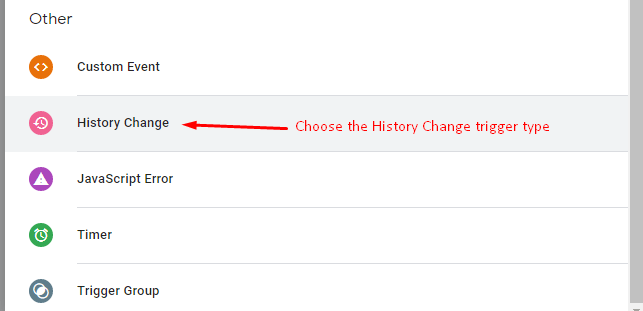
- Progress change – so that you can see each step of the shopping cart in the analysis (the widget is a single-page app, therefore there is a URL, which is why this is needed in addition to the page view trigger):

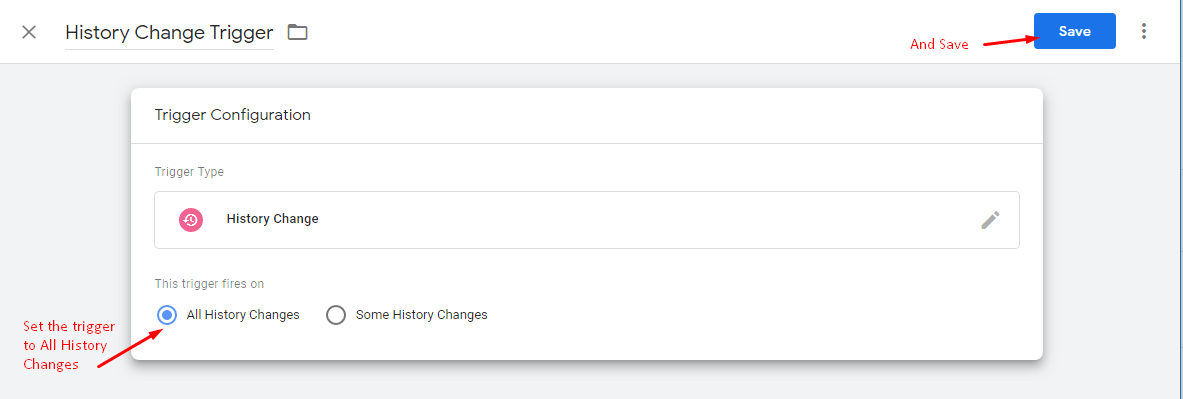
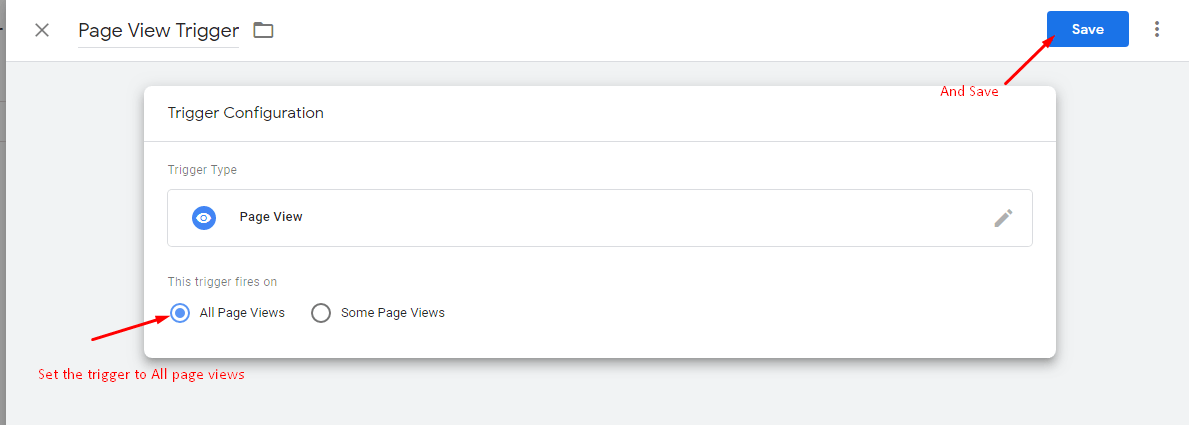
After the two triggers have been assigned to the day, you can save the configuration:
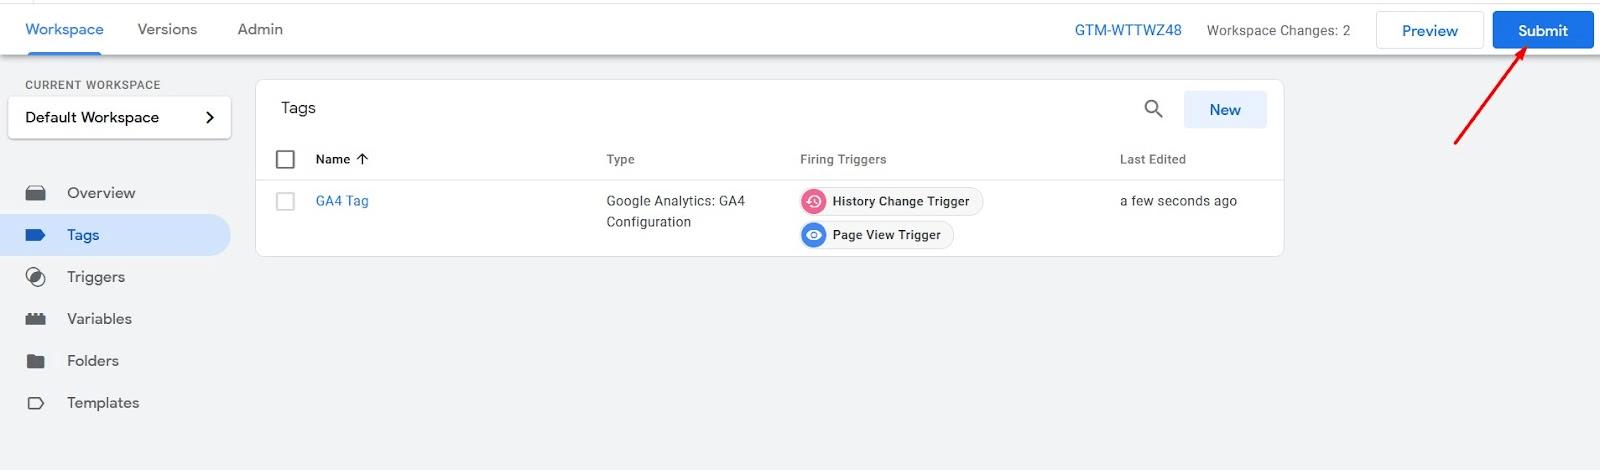
In your workspace, click Send and then Publish to save the changes to your account.
You can test whether the connection was successful by accessing your order widget from a mobile device. Add some items to the shopping cart and leave it open.
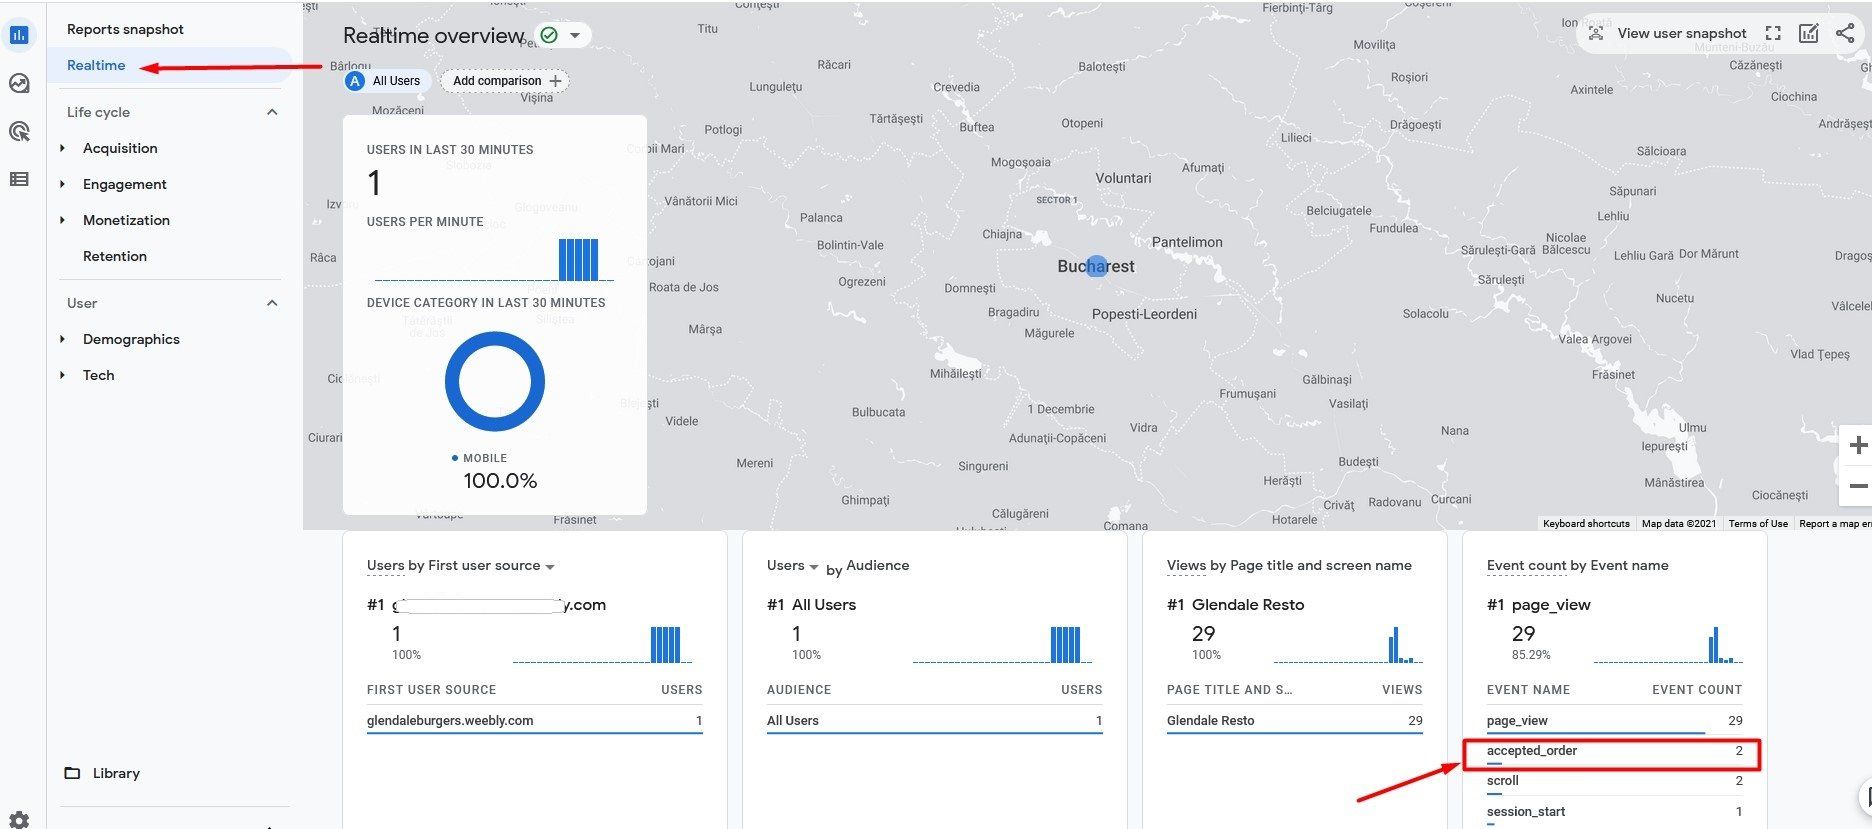
Then go to your Analytics account -> Reports -> Real-time and check if any visitors have been reported in this section, something like this:
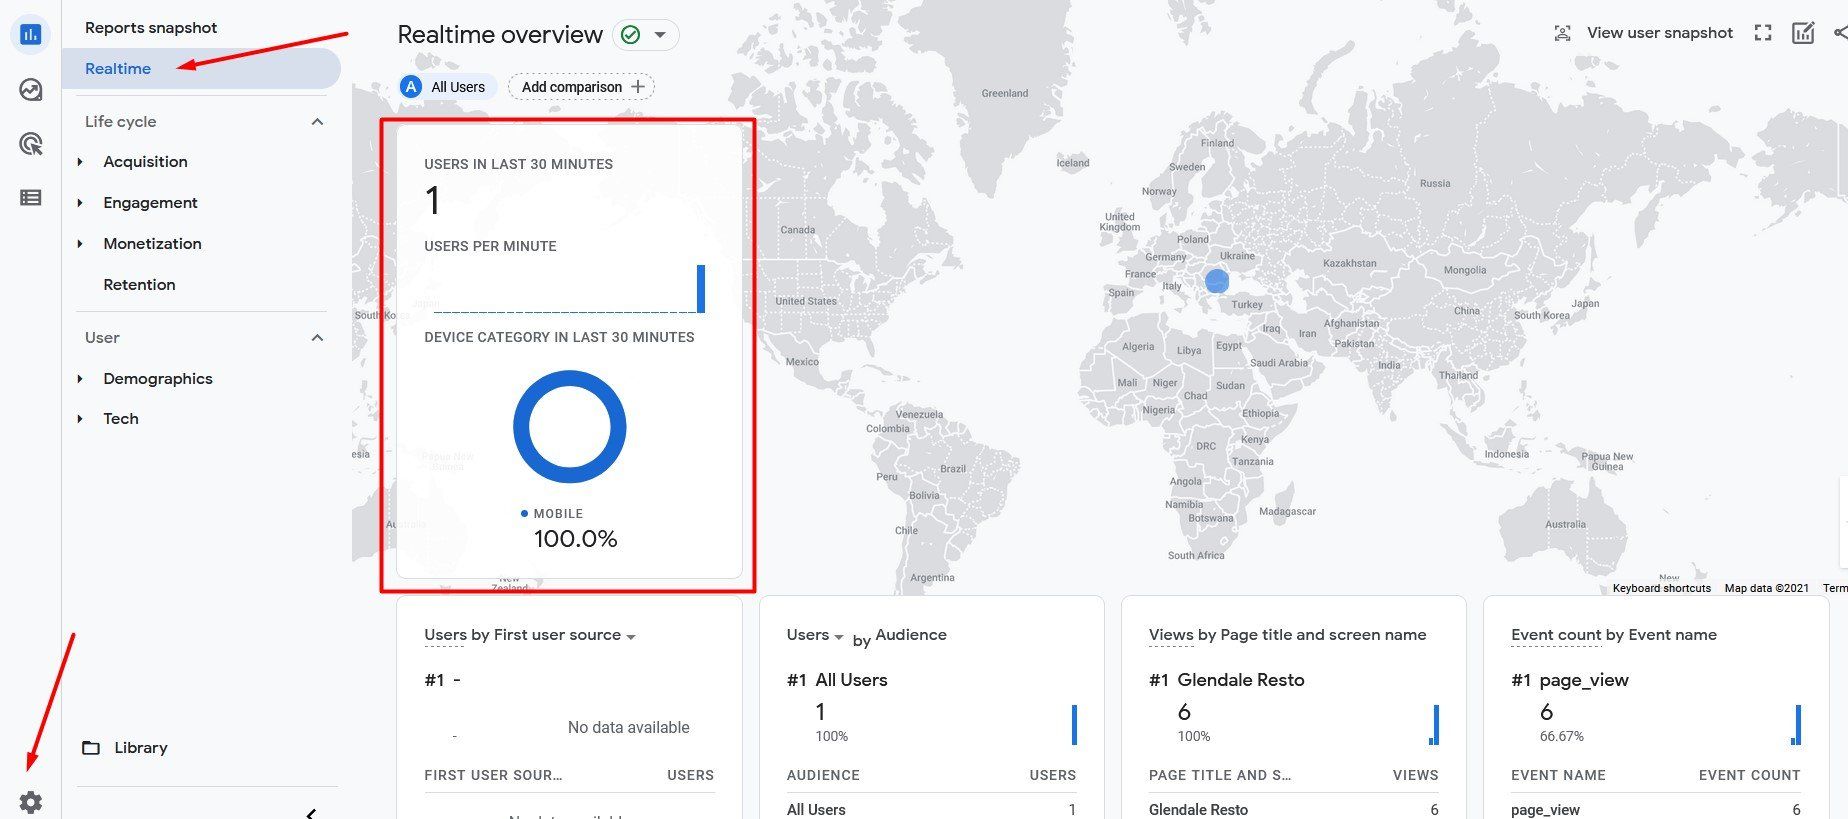
Please note that it may take between 30 seconds and several minutes for real-time data to be displayed. We also recommend using your mobile data plan when performing the test.
Set up conversions
A conversion in Google Analytics is a completed online activity that is important for your business's success. One type of conversion you might want to track and monitor for your restaurant is a completed purchase (order accepted).
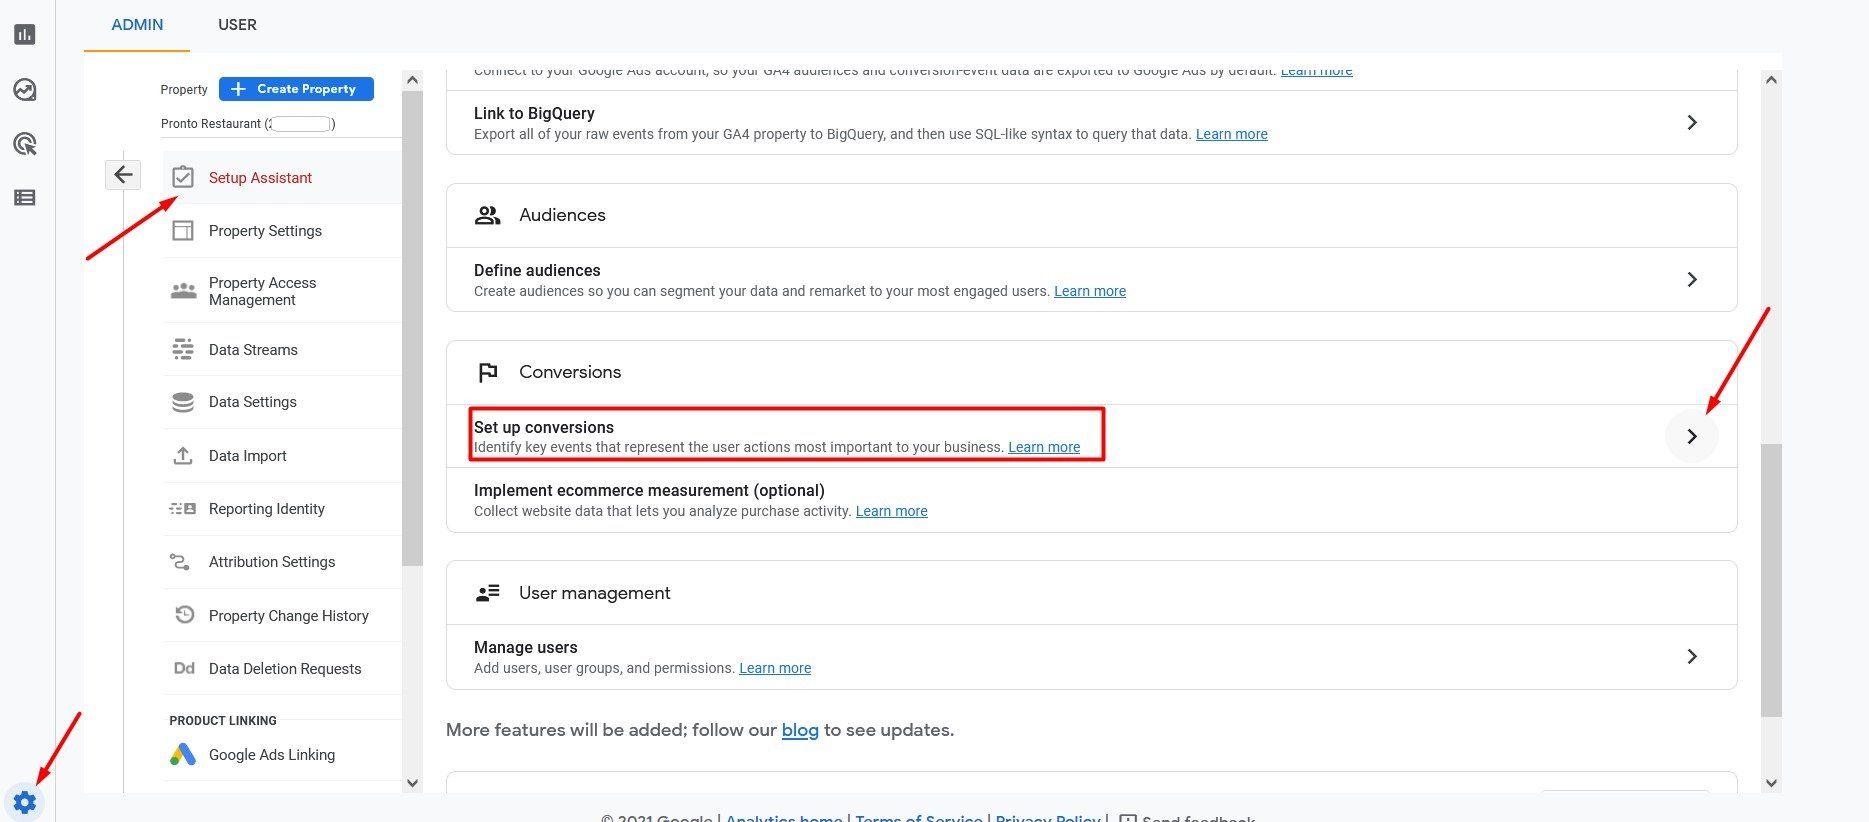
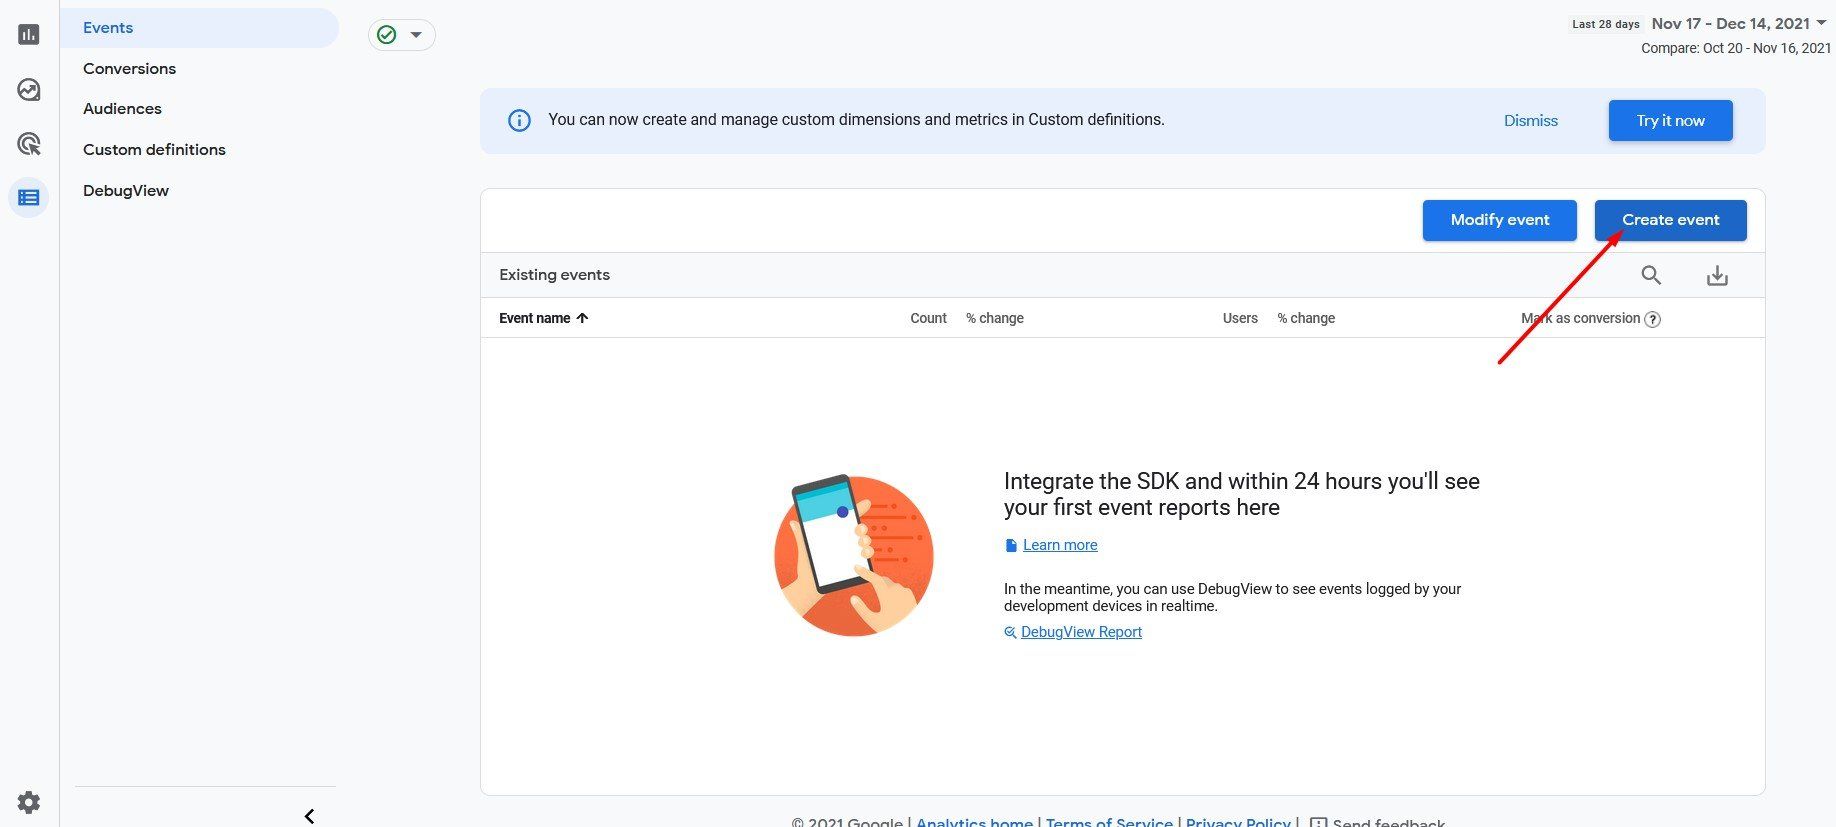
To set up a conversion, go to Admin -> Setup Wizard -> Conversions in your Google Analytics account and click on Set up conversions:
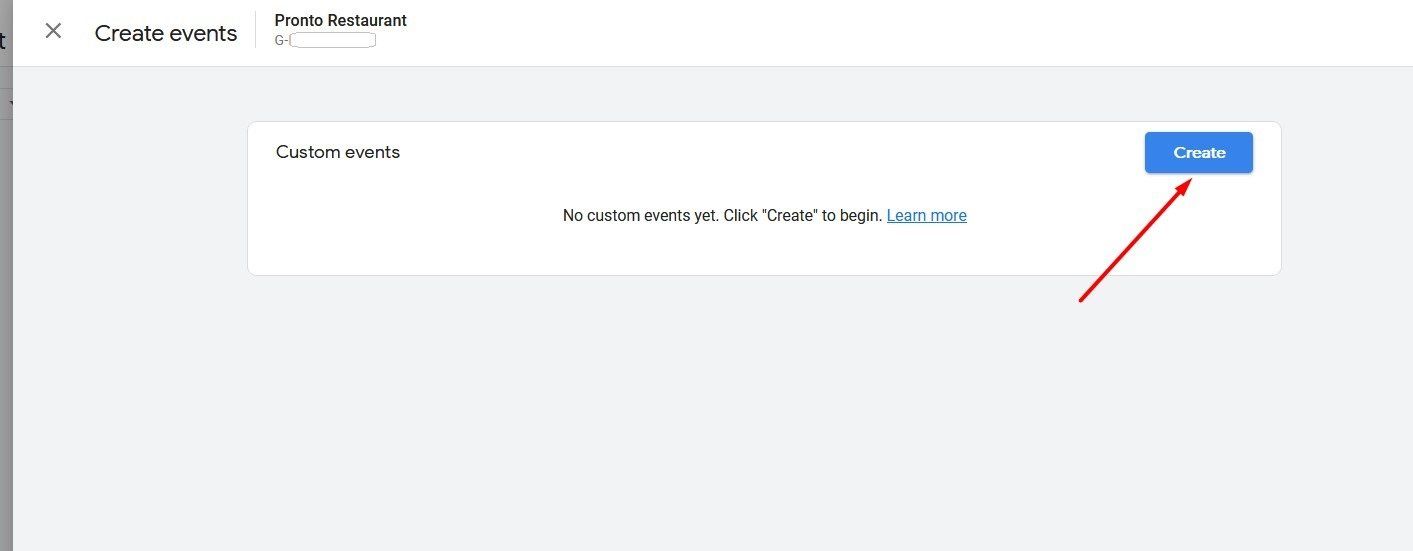
Before you define the conversion itself, you need to create an event like this:
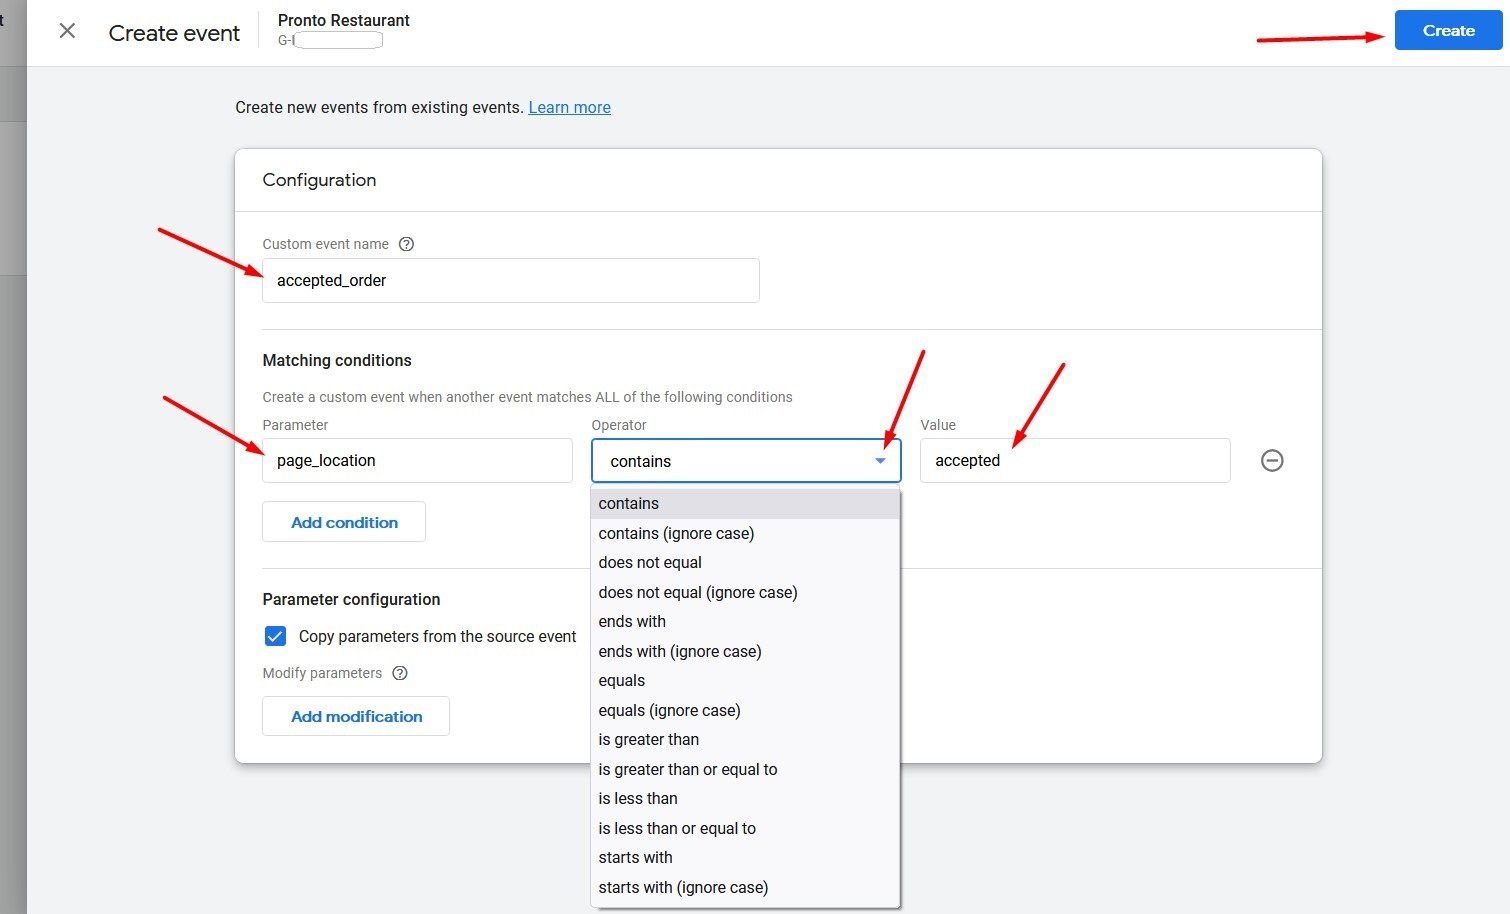
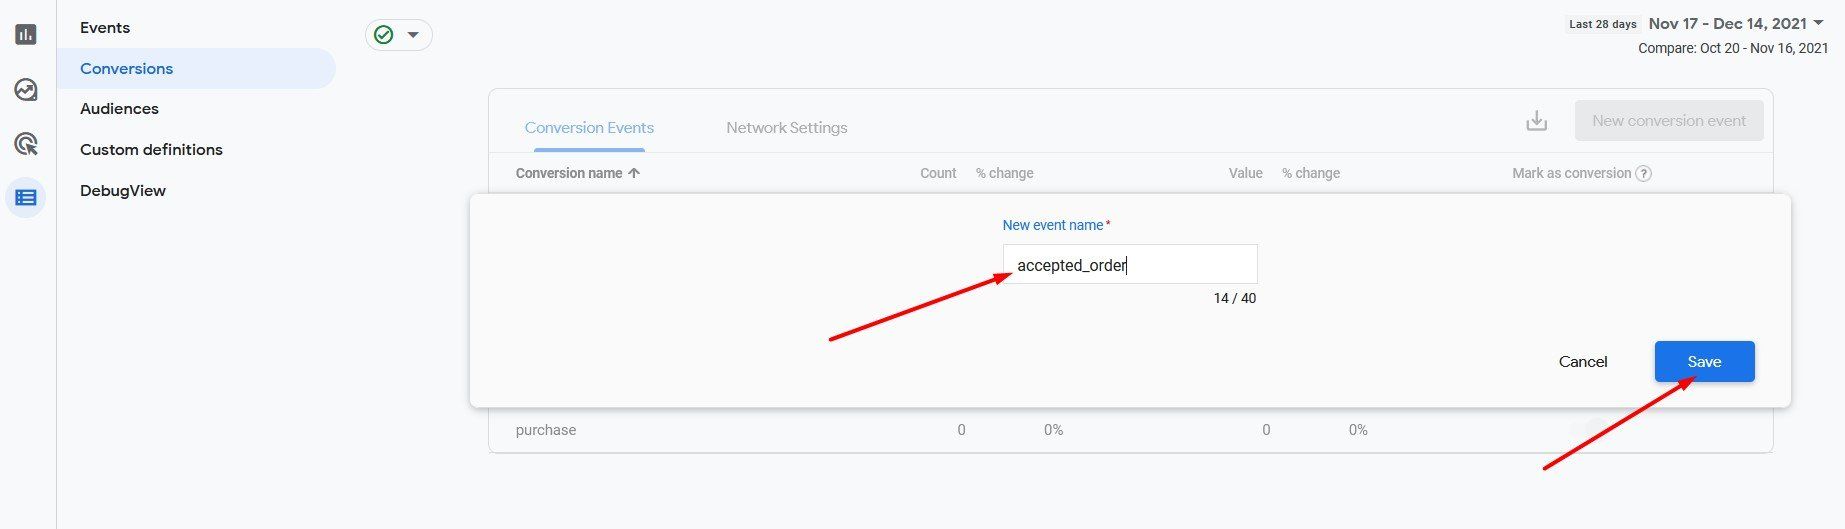
Define the event by specifying a name – in this case “accepted_order” – and enter the next event attributes required by Google:
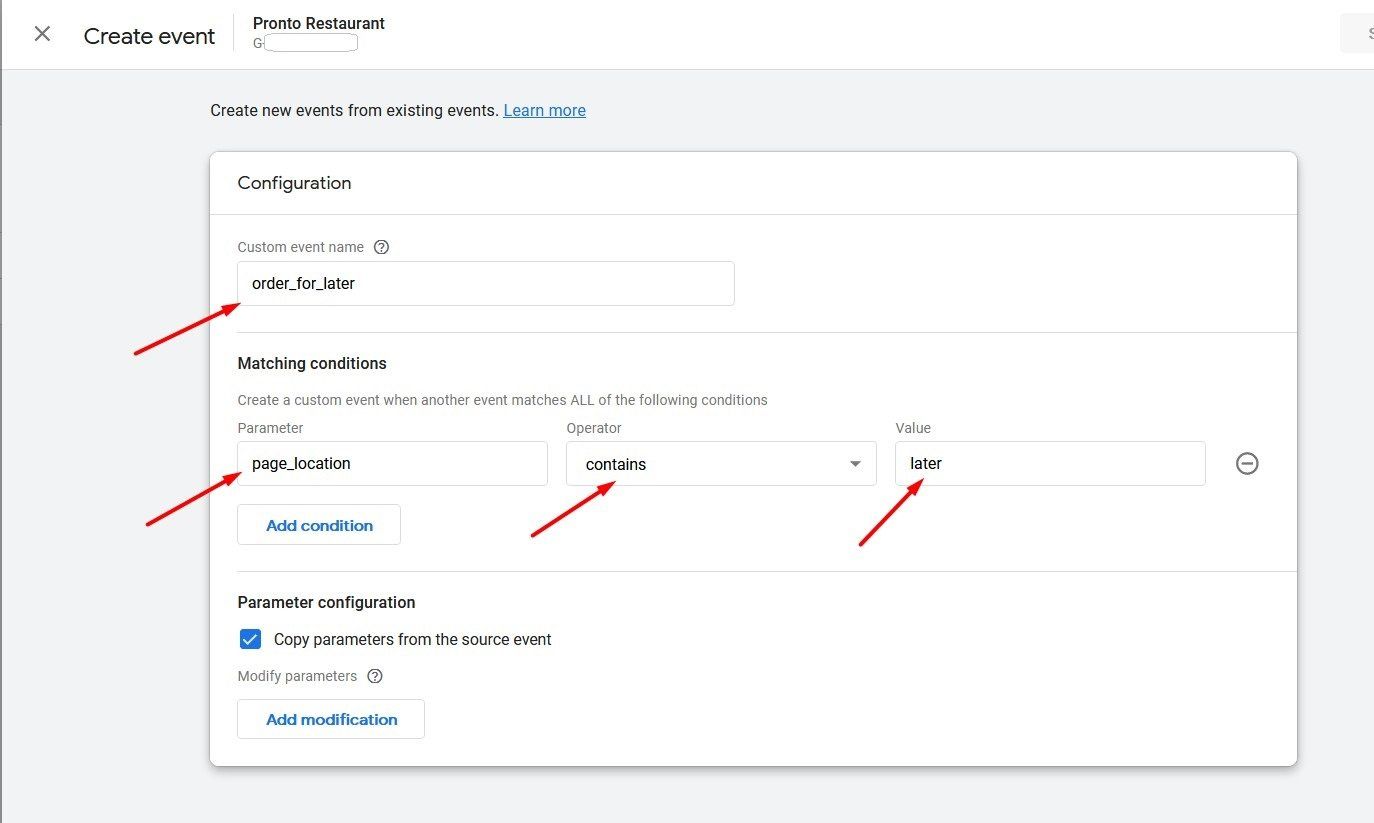
- Parameter: page_location
- Operator: contains
- Value: accepted
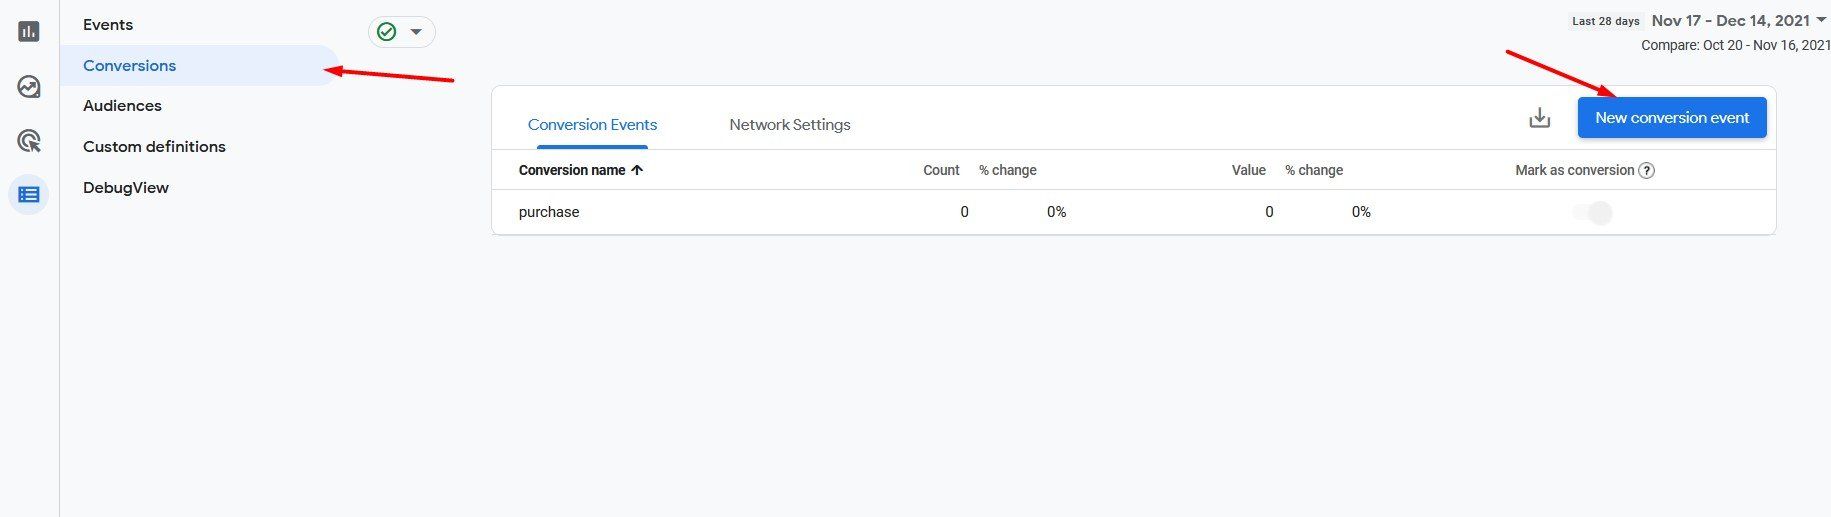
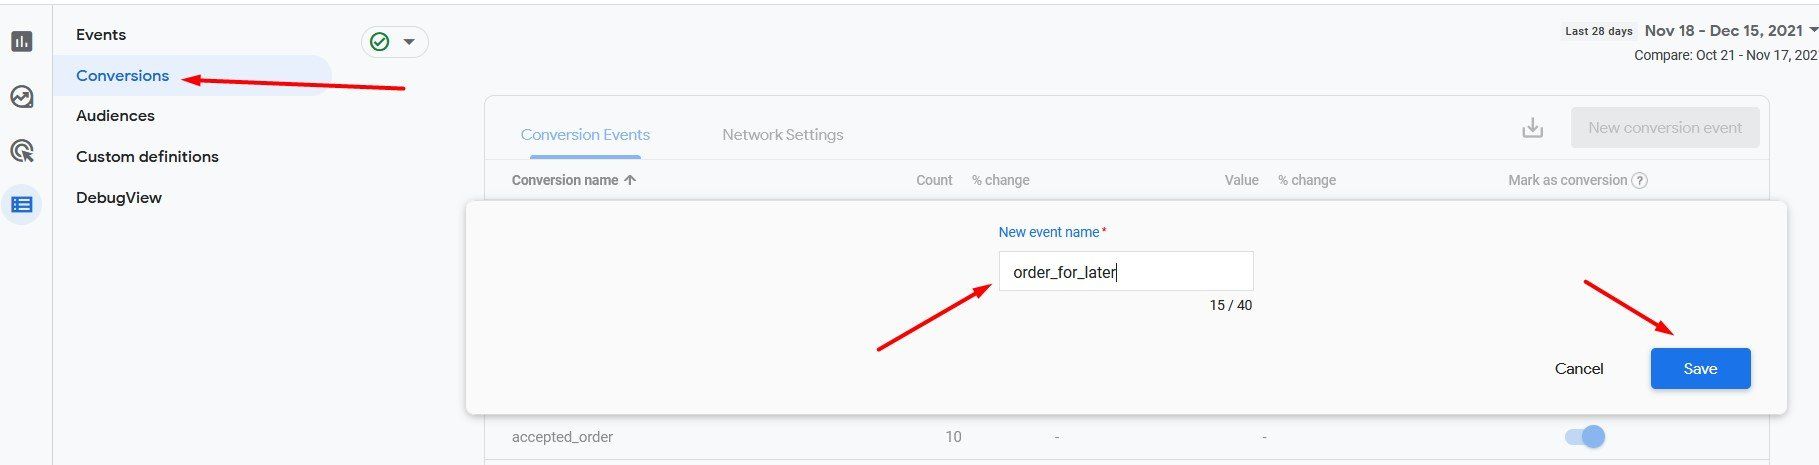
After creating the event, return to the main menu -> Conversions and click "New Conversion Event" to begin defining the conversion. You should enter the name of the previously created event – "accepted_order" – and click Save to complete the setup process.
In the same way, you can create an event and then a conversion for later orders:
Since Analytics tracks page views, it is not possible to identify which of the tracked orders placed outside of restaurant opening hours were accepted or not, as the food customer is no longer on the respective page by then.
If you want to test conversion monitoring, access the order widget again from a mobile device, add items to the shopping cart, and this time complete the order.
Then go to your Analytics account -> Reports -> Real-time and check if the accepted order is reported in this section, as follows: